Migrating from Tableau Server to Tableau Online
Understanding how to make the jump to a cloud-based offering using Tableau’s Content Migration Tool
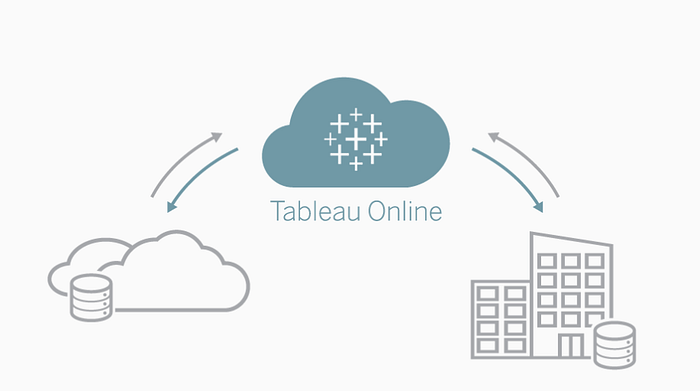
As we move towards a more cloud-based world, a jump from Tableau Server to Tableau Online becomes a more important strategic consideration for businesses, especially with the improvements made to Tableau Online in recent years. However, such a move can sound pretty daunting - even the slightest worry of your entire Tableau Server being lost is enough to keep anyone awake at night! But no fear, this article should help streamline the process and make it as safe as possible.
In this article we will cover:
- Migration methods
- Pre-considerations before migration
- Content Migration Tool and limitations
- A Step-by-Step Guide for migration using the Content Migration Tool
Migration Methods
There are several methods to migrate content from Tableau Server to Tableau Online. These include:
- Content Migration Tool
- TabCMD Script
- REST API
- TabMigrate
Which of these you decide upon is based on your company’s requirements and available resources. This article, however, will specifically focus on the Content Migration Tool, which tends to be the quickest and most effortless method.
Before we Begin Migrating:
- Ensure you have a full backup of your Tableau Server.
- Be clear on the differences between Tableau Server and Tableau Online. I would recommend this blog as a good starting point, but do get in touch with your Tableau Account team for any specific questions.
- Make sure you have an Explorer role or higher if you plan to carry this out on your server.
- Following on from the above, ensure that you have ‘View’ and ‘Download/Save a Copy’ workbook permissions on the source site for the content you would like to migrate, and publishing permissions on the destination site.
- Create your users and groups from the outset in your new Tableau Online site. Trust me, this will make things easier later down the line!
- Have the relevant database credentials to hand.
Content Migration Tool (CMT)
The Content Migration Tool is a Tableau-supported software that provides a UI for migration, to make this process faster, easier, and code-free. Having said this, the possibility of automating the process does still exist, as instead of using the UI, you can also use and initiate the tool with the Command Line.
By using this tool, you can migrate a variety of content, including sites, projects, and workbooks to name a few. You can also use the CMT to migrate content across projects and sites sitting in the same server. At the time of writing, the CMT is provided for free for 3 months if Tableau Server to Tableau Online migrations would like to be carried out. Please get in contact with your Tableau Account Team for more information.
CMT Limitations
Before we dive into the process of migration using the CMT, we should discuss some limitations.
Server Level Configurations
The following server-level configurations from the source site will not be migrated to the destination site when using the Content Migration Tool:
- Users
- Groups
- Project Permissions and Locked States
- Site Settings
Moreover, in a migration from Tableau Server to Tableau Online, data extract schedules will not be maintained. Typically, Tableau admins will set up extract schedules, users, groups, project permissions, and site settings after the migration has taken place, although some of these configurations may also be set up prior to the migration. In addition, if you have multiple sites in your Tableau Server environment, these will need to be migrated into a single Tableau Online site, or you will need to contact your Tableau Account Team to provision multiple Tableau Online Sites.
Having said all this, you can always leverage Tableau’s REST API in conjunction with the Migration Script Options (See Point 6 below) to migrate the above content programmatically if needed.
Workbooks with User Configurations
The following user configurations from the source site will not be migrated to the destination site when using the Content Migration Tool:
- Data-driven alerts
- Subscriptions
- Custom Views
- Favourites
- Comments
Since we are moving content to a brand-new site, these interactions will need to re-produced, if needed. With alerts and subscriptions specifically, these can either be re-made by an admin, or you could alert your Tableau users of this change and ask them to reproduce and re-subscribe to any alerts or subscriptions they may want. As well as this, just as before, you can also use Tableau’s REST API to do a one-off migration of Subscriptions, Data-driven Alerts, and Favourites of your workbooks if you prefer.
Other Considerations
There are also a few other considerations that are out of scope for the CMT, but typically these will affect very few migrations. These considerations are:
- Embedded credentials are automatically removed for security reasons, but can be included in the data source transformation step if needed.
- Content Metrics are not migrated.
- Content descriptions are not migrated.
- Content owners are not maintained in a migration. These must be set manually after the migration has taken place, or changed using the REST API.
- Prep flows cannot be migrated using the tool.
- Thumbnails may need to be updated.
With all those considerations out of the way, we can now jump into our step-by-step guide!
Step-by-Step Guide
Before you migrate, a carefully written plan should be produced. Plans will differ based on the amount and types of content needed to be migrated. Best practice would be to clean as much of your Server’s old content as possible. A basic example plan can be seen in the image below.

1. Migrating the Server
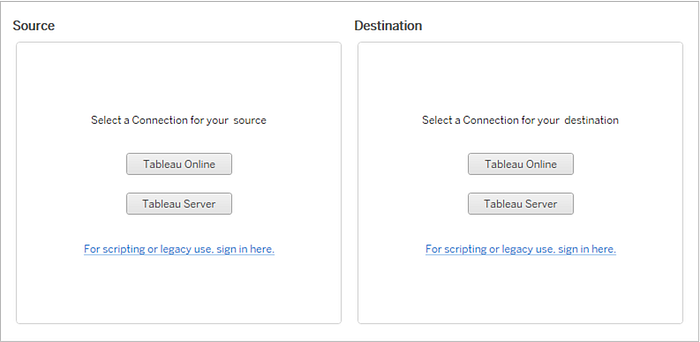
Once your plan has been created, you can get stuck in and use the CMT! To begin, input your Tableau Server connection information as the Source server, and your new Tableau Online instance information as the Destination server.
2. Migrating Projects
Next, you can choose to migrate all projects or specific projects. This gives you a chance to clean up any old or redundant projects, that are no longer used by the business.

3. Migrating Workbooks
Beyond migrating all workbooks and specified workbooks, in this step of the tool, you also have the option to migrate workbooks based on rules. These rules can be based on which projects the workbooks live in, who the workbooks were published by, or which tags are used on the workbooks (for example, you can use the #production tag to move only the production workbooks in your server).
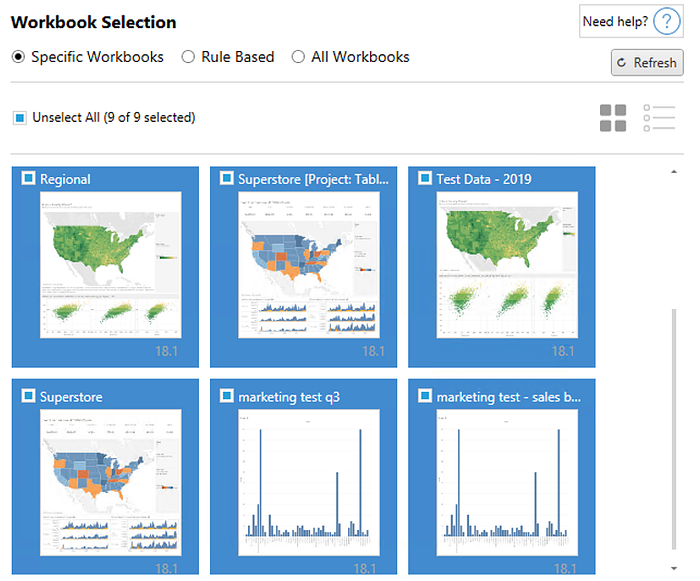
Within this step, you also get various workbook mapping and workbook publish options. These allow you to rename your workbook, change its project, and add or remove tags. Furthermore, you are also given the ability to transform both your workbook and workbook data sources within this step, meaning that any legacy databases can be replaced if needed. The images below display the options available at this stage.

4. Migrating Published Data Sources
The CMT also enables admins to migrate published data sources. This differs from our previous step, which only allows you to carry out changes on data sources that are embedded in workbooks. In this case, like before, you can migrate all or specific published data sources, as well as having the ability to move published data sources based on rules. Similarly, you are also able to carry out mappings and data source transformations. During this step, you are given almost exactly the same options as our previous step.
5. User Permission Mapping
In this step, you can migrate Active Directory (AD) user and group permissions from your Server environment to your new Online environment, if the AD groups/users don’t match the Tableau Online naming conventions. Before we get stuck in, a couple of caveats:
- You will not be required to use this step if you are migrating from Local Authentication on your Server environment, to Local Authentication in your Online environment.
- You will be unable to use this step if you are migrating from AD Authentication to Local Authentication.
If you are migrating to Online from a Tableau Server configured with AD, you will have the capability to carry out Domain mapping and User/Group mapping. These mappings can be used in conjunction with one another. For example, in the image below, you may first map all users using domain mapping, and then map a particular user to a different group using user/group mapping. The order of user permission mappings can also be altered.

Whilst the user permission mapping step does exist, it is best practice to create your user and group permissions from scratch in your Online site. This is because this step is reasonably time-consuming to carry out and can lead to issues if the CMT is unable to exactly match particular users or groups.
6. Migration Scripts
Very briefly, in this step you are given the opportunity to run any scripts you may need, either pre or post migration. For example, if you needed to automatically create new users, set project permissions, or delete content after the migration, this step allows you to do that with the help of the REST API. In this step, you are also given the option of inserting parameters for your scripts, if needed.
7. Migration Options
The final step of the CMT is selecting any closing options from the list below.
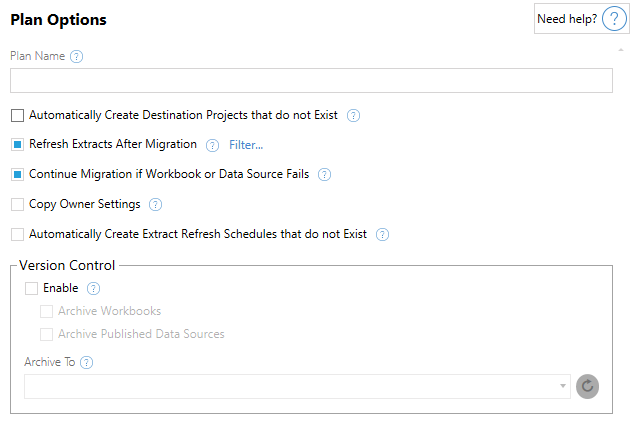
Most of these options are pretty self-explanatory. However, one thing of note includes having the option to create destination projects that don’t exist, which is useful for a migration. If more information is needed about any of these options, the help icon will display more detail. Within these options, version controlling also exists, preventing any existing workbooks on the destination site to be lost.
Once these options have been selected, you will also have the ability to save this plan for future use cases if you would like. This can be beneficial when you have carried out specific cleaning or transformation steps, which will be re-used by the business in the future. When you are ready, click ‘Verify and Run’ and see the CMT carry out its magic!
Farewell…
Having made it this far, a big congratulations are in order. This should mean that your migration has taken place successfully! 🎉
Although migration of servers can be a long and arduous process, the goal of the Content Migration Tool is to make this process easier. And remember, after migrating to Tableau Online, you will never have to carry out another Tableau Server upgrade again!


![[Tips for Snowflake] A Data Quality Framework using SQL Scripting](https://miro.medium.com/v2/resize:fit:679/1*PBEVH6F9tB5BUTYsfZlWRg.jpeg)


